


+ Play & manipulate music drones
NEW! - Retrieve and install the latest Planet Drone MK2 image
Planet Drone MK2 has a software update! Go to the instructions below.
Planet Drone MK2 Oct 24 2024 software update
Introduction
Sound has a powerful effect on the brain and can be used as a tool to relax and destress. When we listen to soothing sounds, our brain waves slow down, leading to a state of relaxation. This can be particularly useful for individuals who struggle with anxiety, stress, and insomnia.
One way that sound relaxes the brain is through the process of entrainment. This refers to the tendency of our brain waves to sync up with external rhythms, such as the sound of music or the sound of ocean waves. When we listen to these kinds of rhythmic sounds, our brain waves naturally slow down and become more synchronized, leading to a state of relaxation.
Another way that sound relaxes the brain is through its ability to distract us from our thoughts and worries. When we focus on a pleasant sound, such as the sound of a waterfall or the sound of a favorite piece of music, it can help to draw our attention away from any negative or stressful thoughts that may be occupying our minds. This can be especially helpful for individuals who tend to ruminate or worry excessively.
In addition to its ability to relax the brain, sound can also have a number of other beneficial effects on our physical and mental well-being. For example, research has shown that listening to music can lower blood pressure, reduce heart rate, and even boost the immune system. It can also help to improve our mood, increase feelings of happiness and pleasure, and even reduce the perception of pain.
Overall, the relaxing power of sound is undeniable. Whether it's through entrainment, distraction, or any of its other beneficial effects, sound can be a powerful tool for helping us to relax and de-stress. So the next time you're feeling overwhelmed or anxious, consider turning on some soothing sounds and letting them work their magic on your brain.
Summary
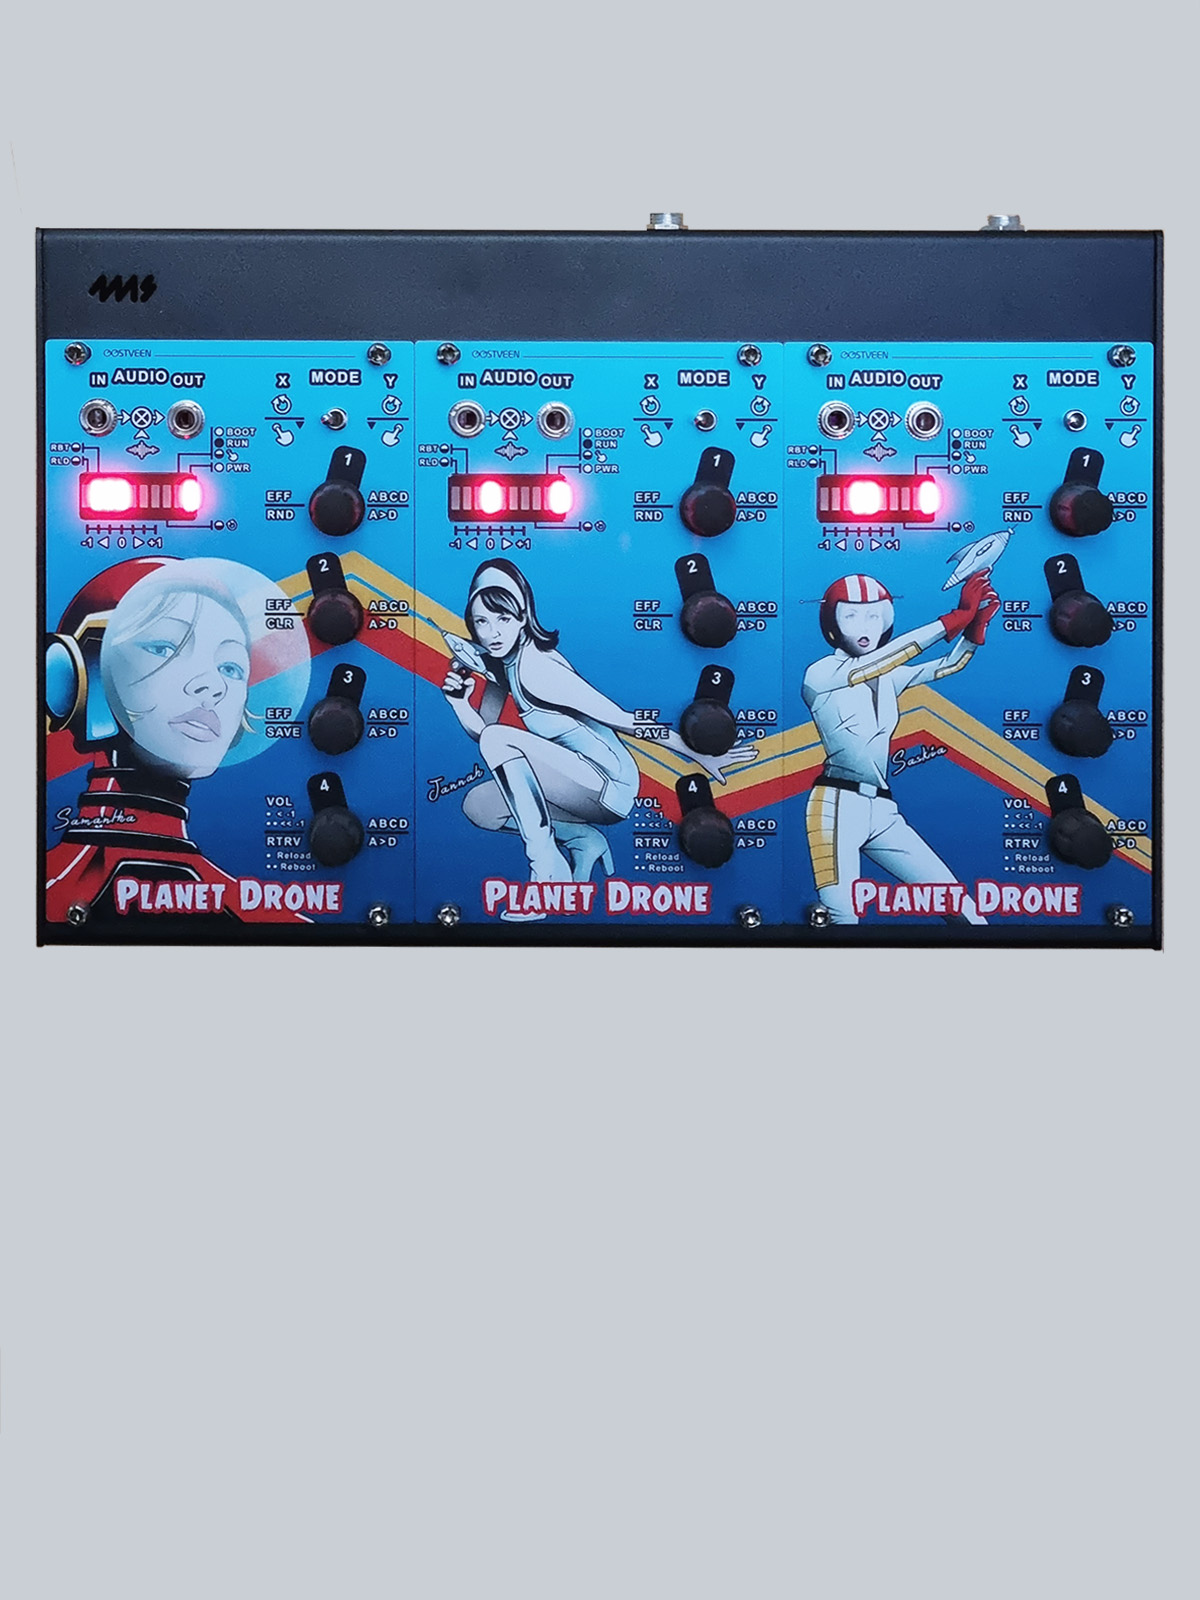
Planet Drone is an Open Source Raspberry PI Eurorack-Module project, which uses the SuperCollider platform to generate distinctive and captivating music drones.
Planet Drone consists of a triad of complementary, electronically-identical, Eurorack modules each wielding a unique set of extraordinary music drones (patches).
Planet Drone is unlike any other synth module in that, on power-up, the module selects a random patch for you to enjoy and manipulate using the four encoder knobs. Multiply this drone-power by 3 (i.e. 3 modules) and you can imagine the wonderful soundscapes you can create!
Each module comes with a selection of patches written in the SuperCollider real time audio synthesis programming language (sclang). If you are up for a challenge you can edit existing patches or even write your own.
Collect or build all three modules and get droning!
 The Planet Drone Module on YouTube
Visit the Planet Drone playlist page.
 The Planet Drone Module on GitHub
Fancy building the Planet Drone Module(s) yourself? - then please visit the Planet Drone GitHub project page.
Module Specs (each)
- Stereo Sound
- 3U/16HP = approx. H129mm x W81mm
- Depth approx. 30mm
- +12V = 400mA, -12V = 0mA, +5V = 0mA
User Guide
Index
- Quick Start Guide
- Front Panel
- Module operations in X MODE
- Module operations in Y MODE
- Planet Drone - The inner workings of
- Planet Drone - Advanced stuff!
- FAQ
- Patch Names and Descriptions
Quick Start Guide
Planet Drone MK2 Quick Guide
A very quick start guide here; Insert the power flatcable from your Eurorack's power supply into the rear of the module. Connect the stereo output to your mixing console. Switch on power. Boot up takes about 30 seconds, typically, but can take up to 2.5 minutes depending on Linux "housekeeping" tasks. Power up is shown below. When the 2nd LED from the right goes off, you are good to turn up the volume.
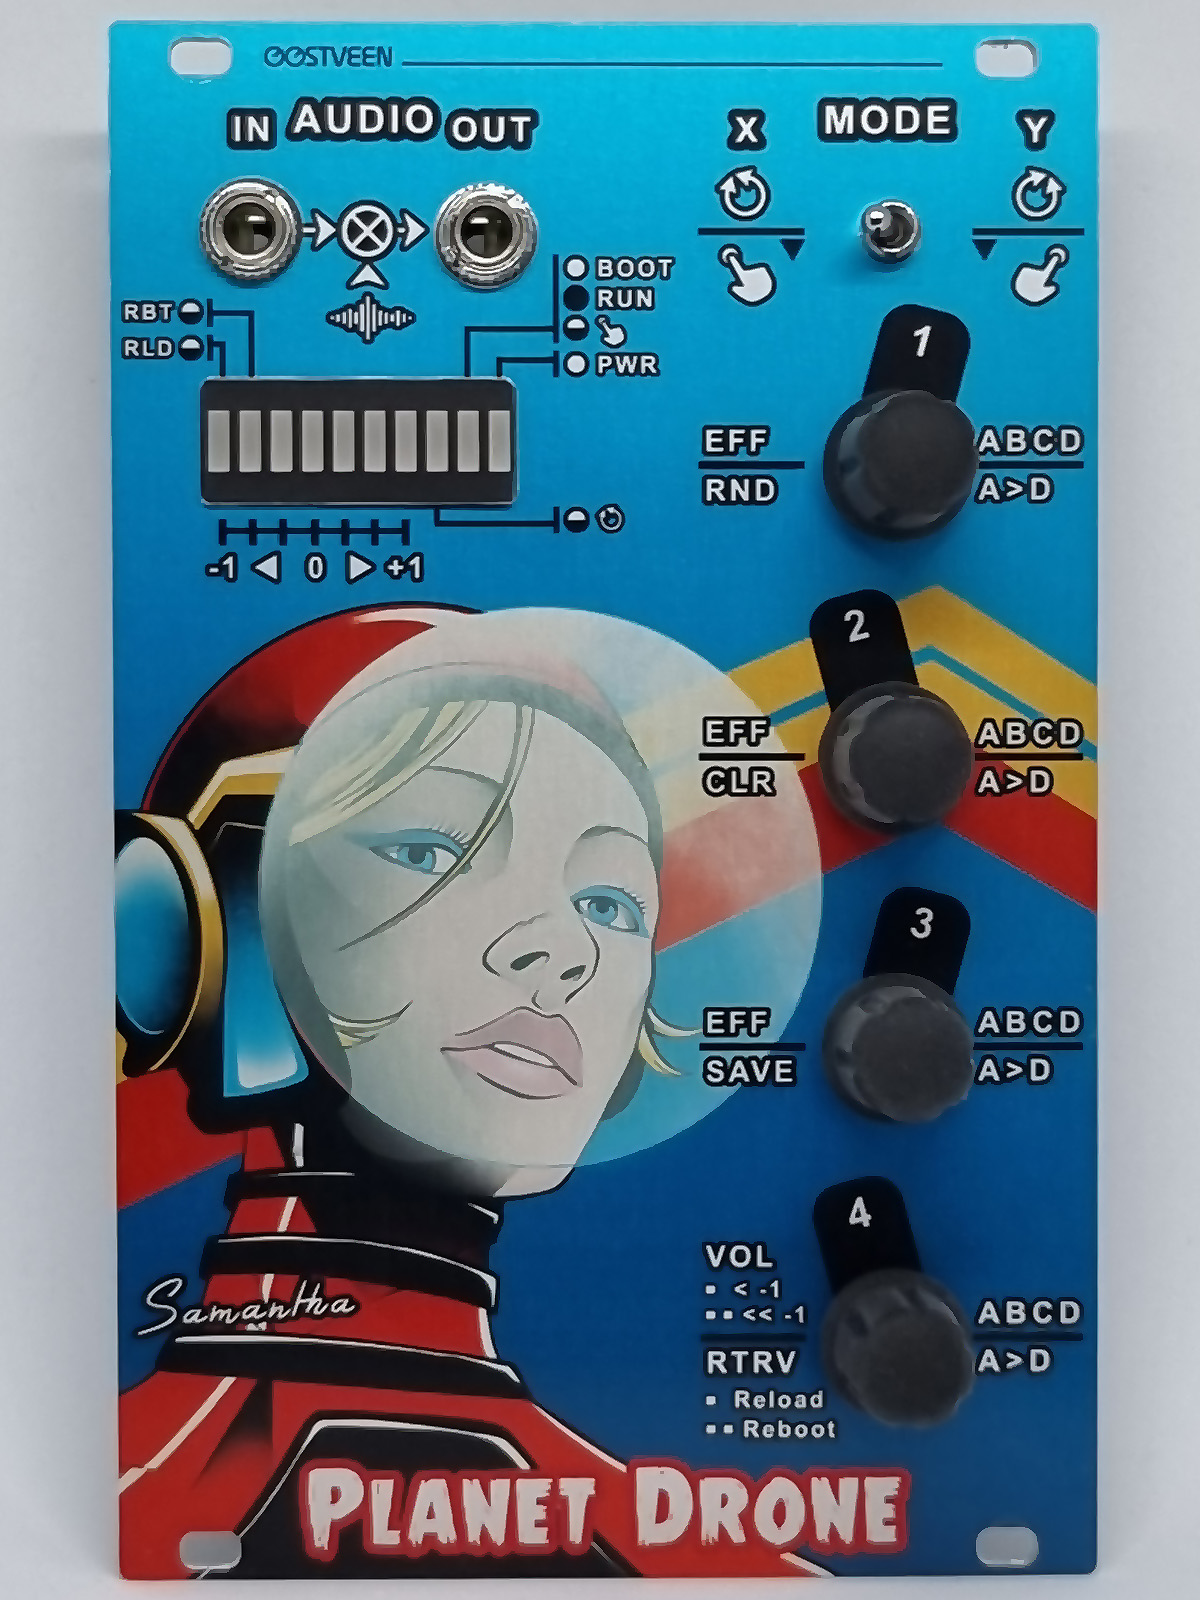
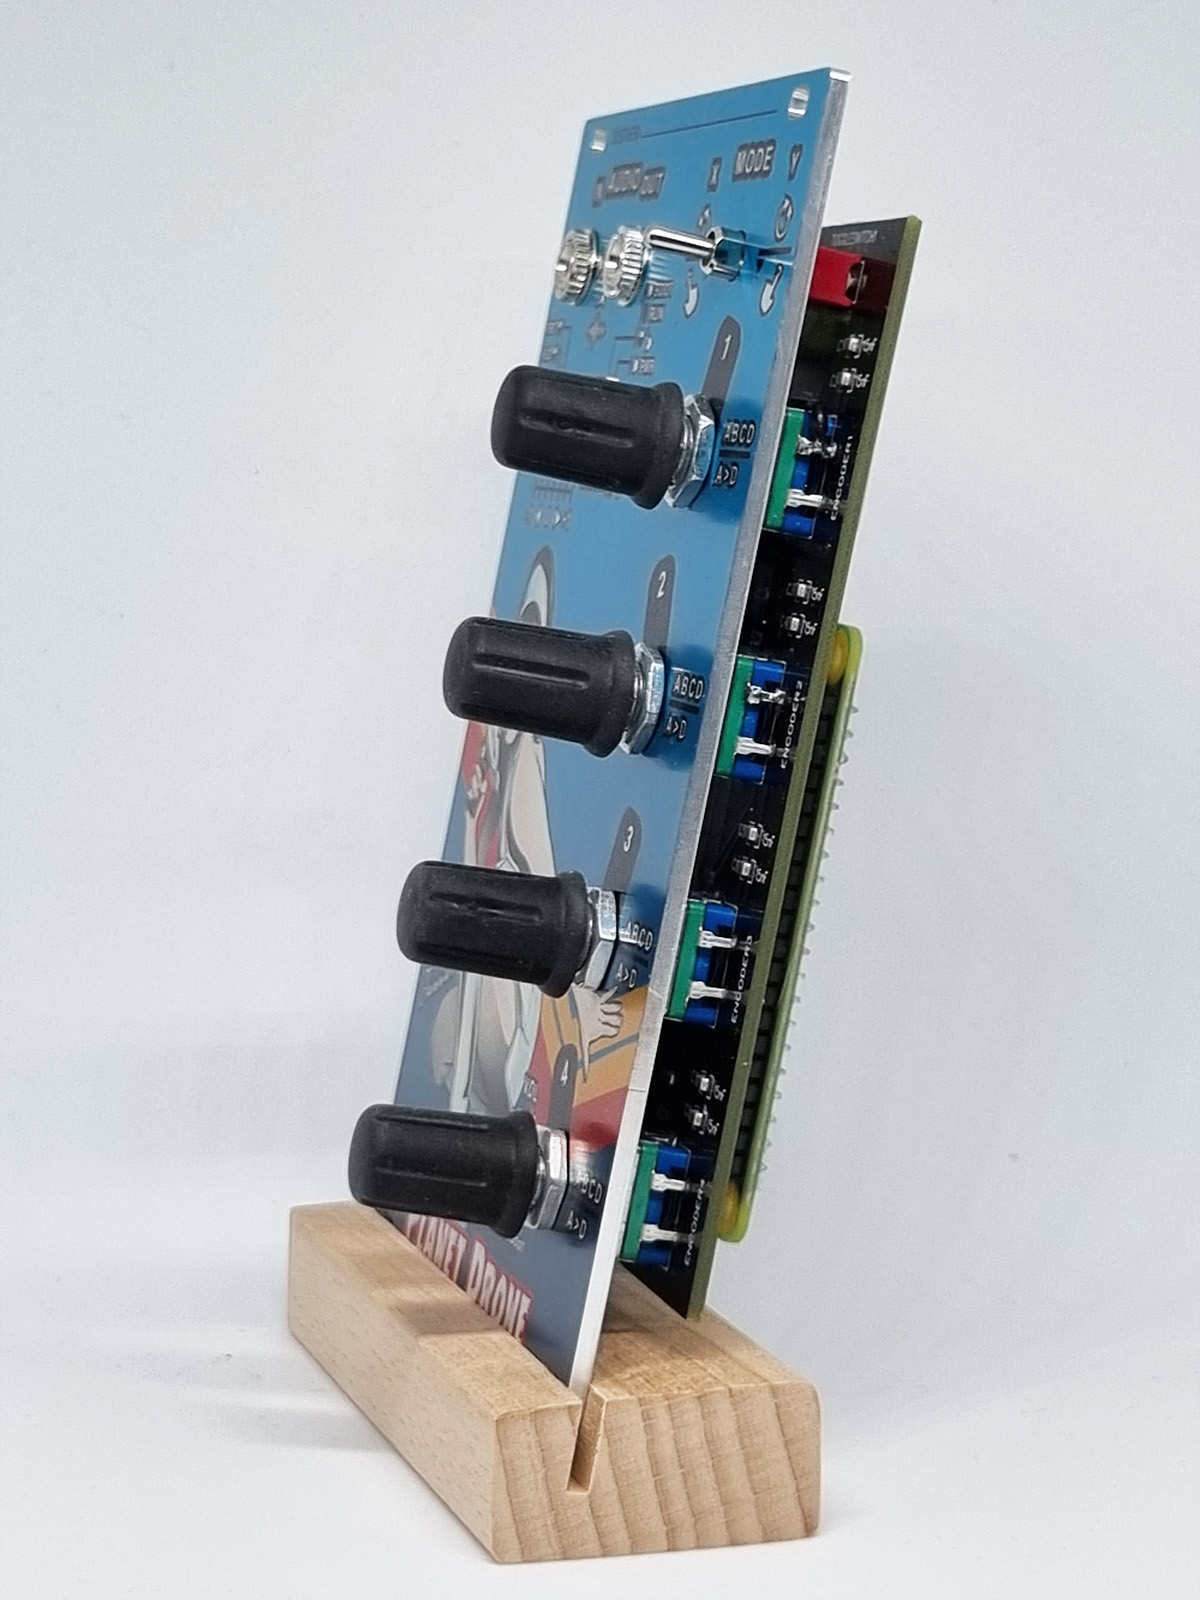
Front Panel
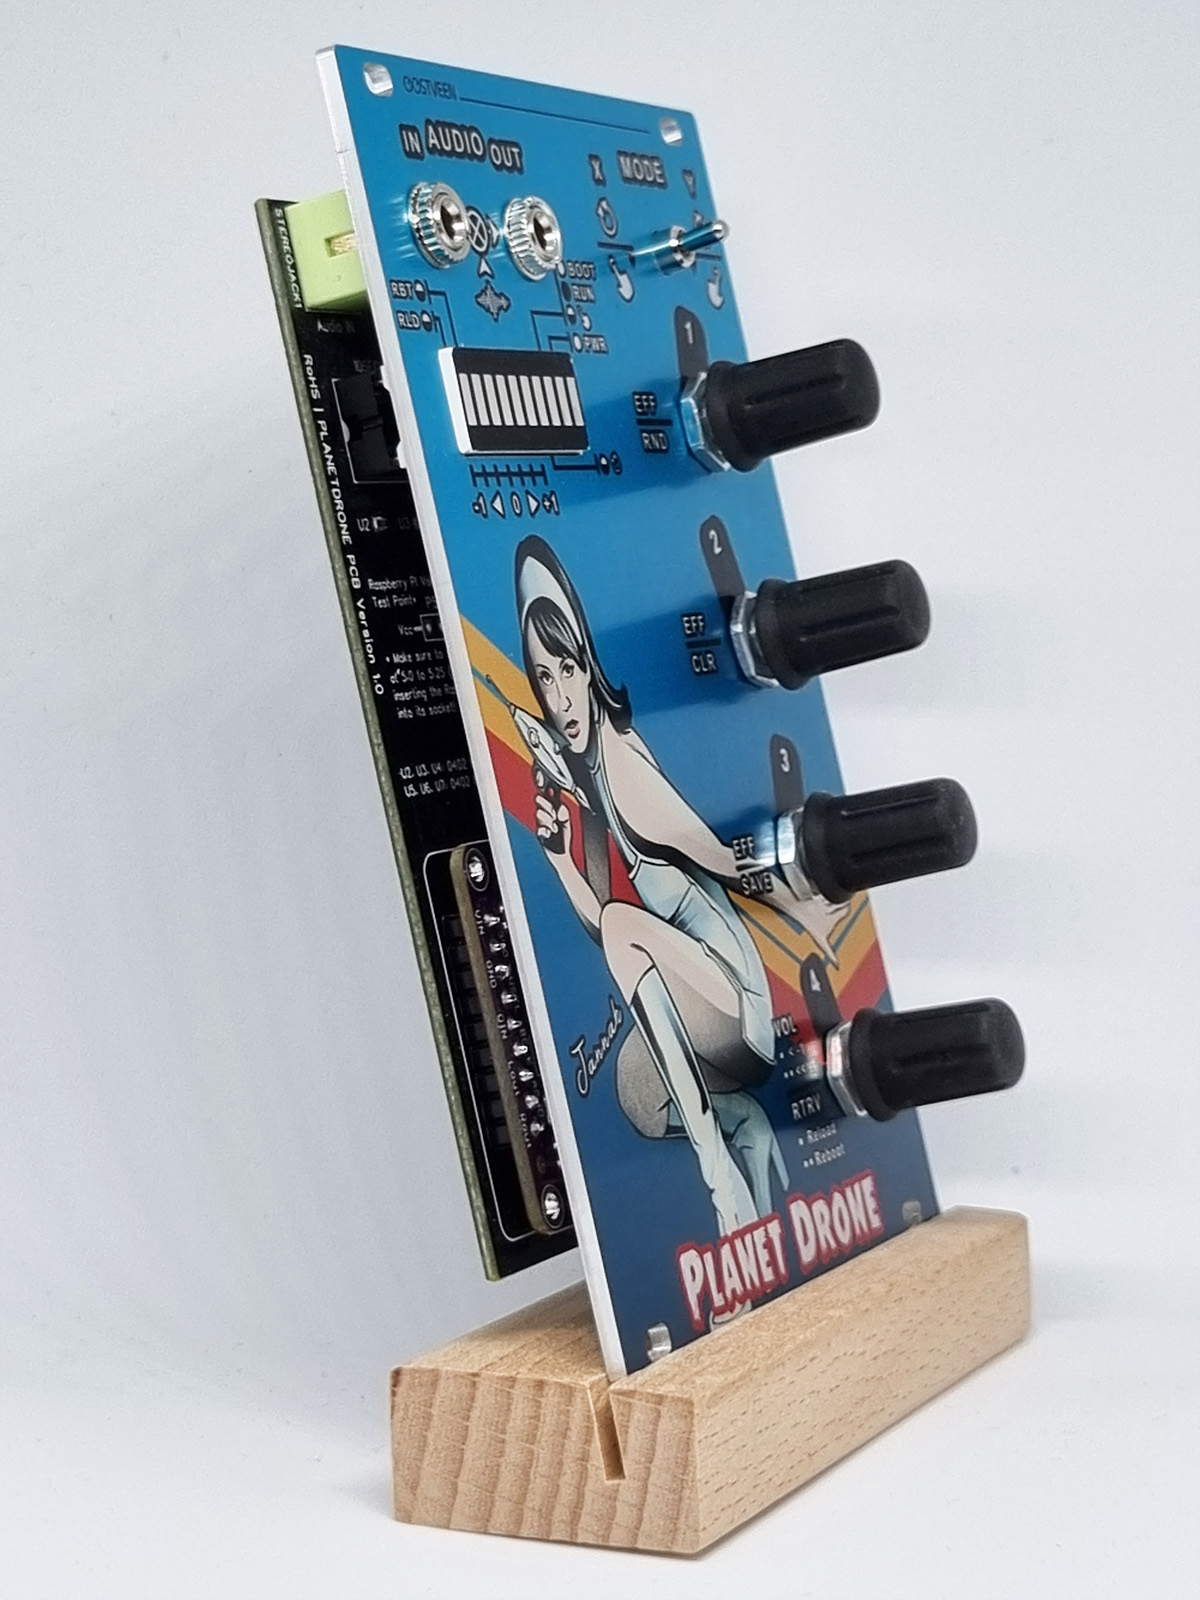
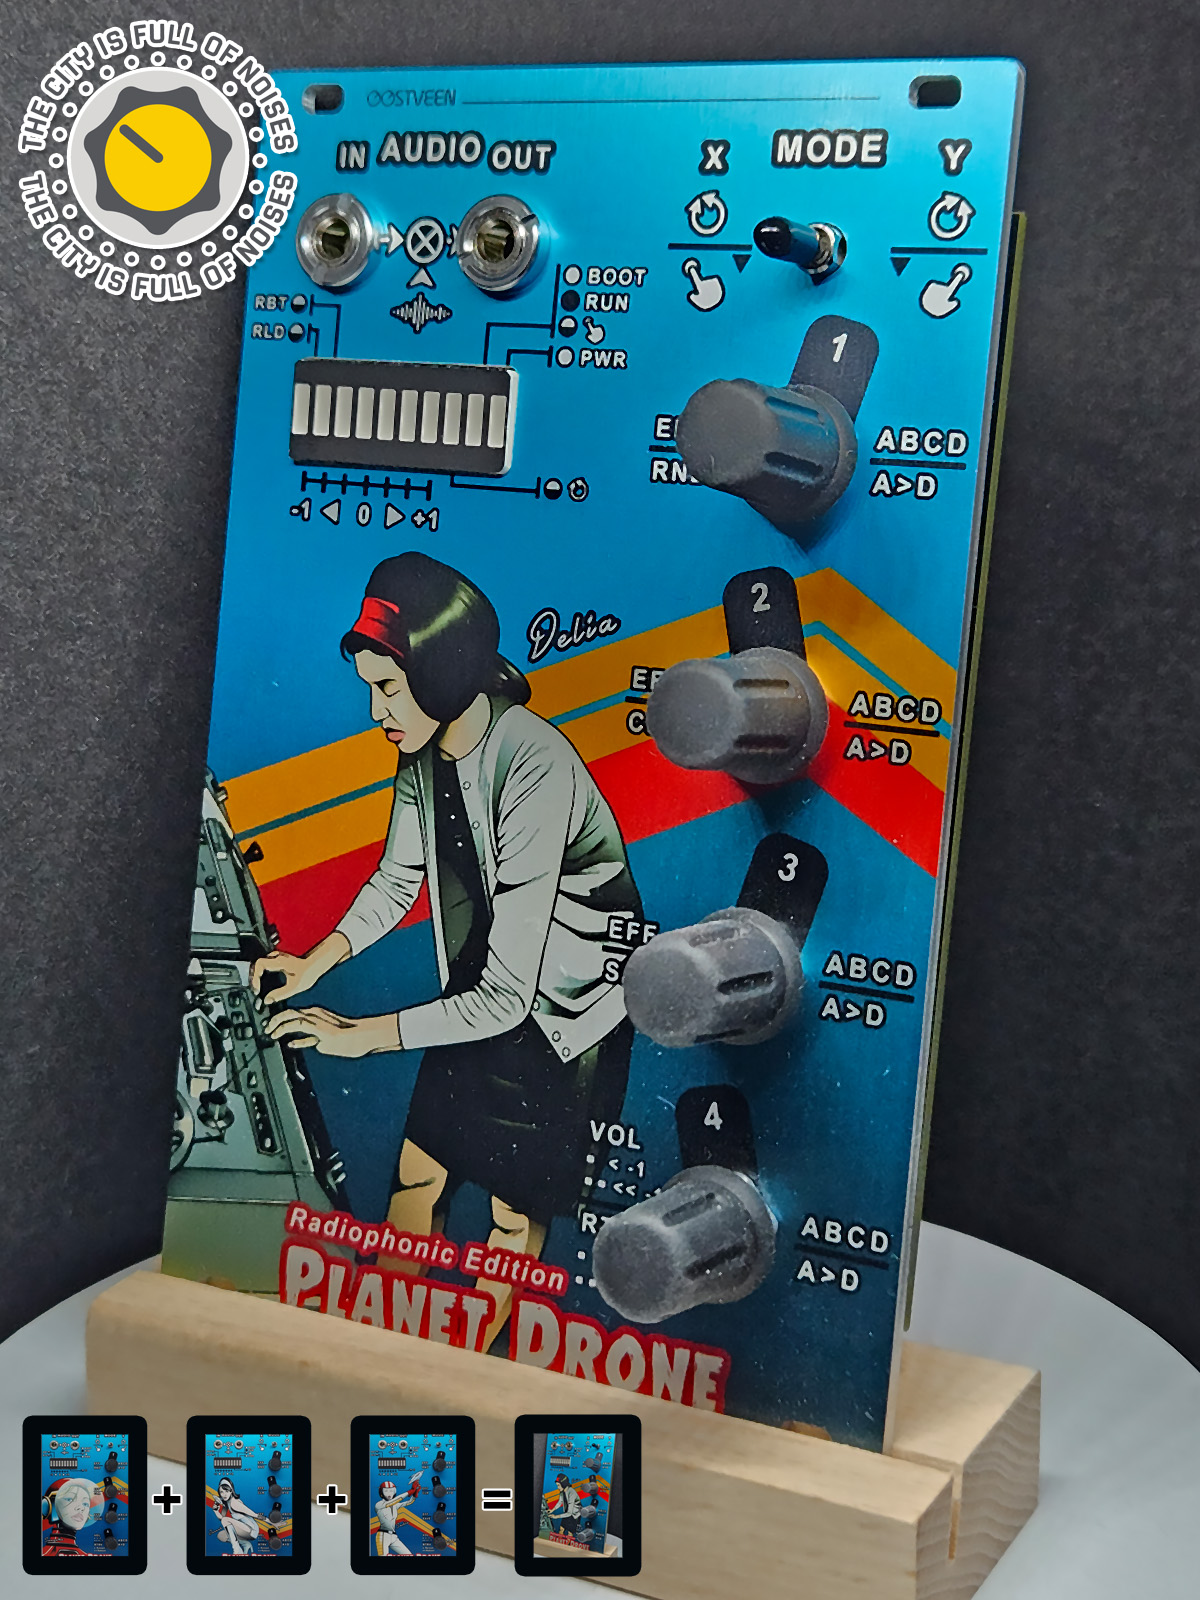
The image below is showing the PLANET DRONE's front panel*.
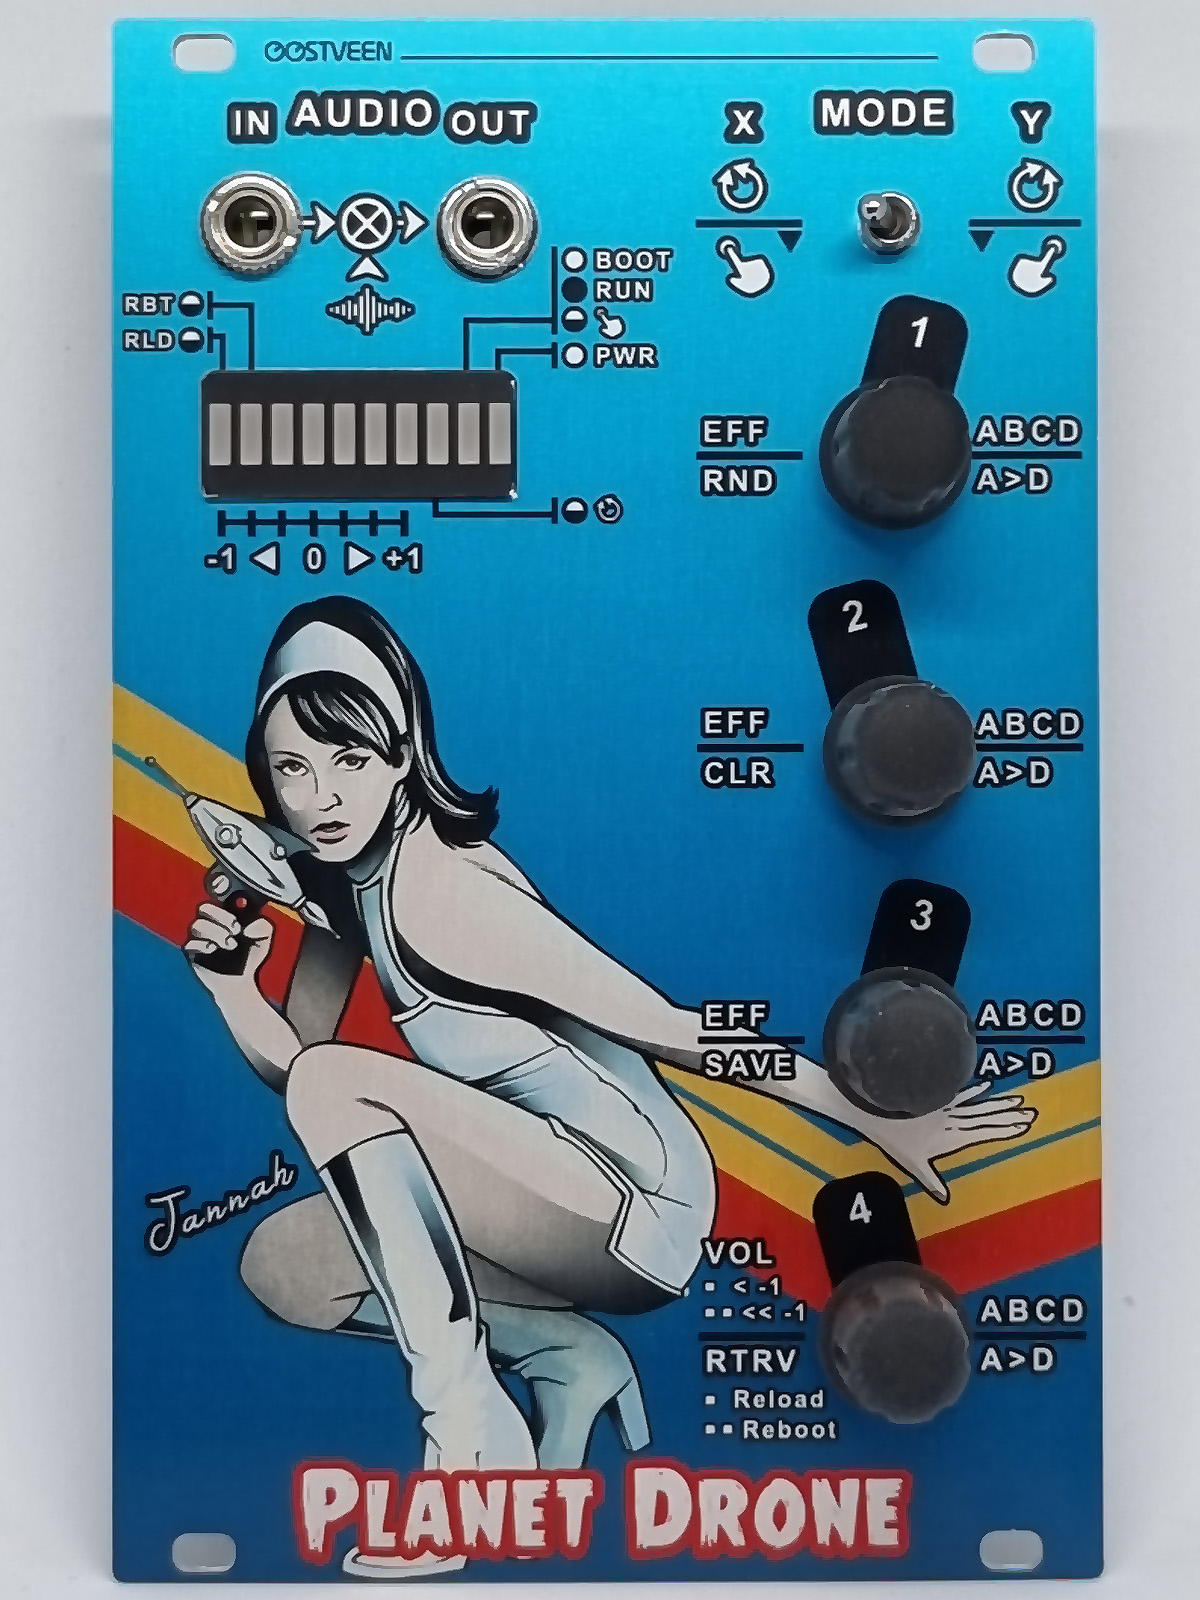
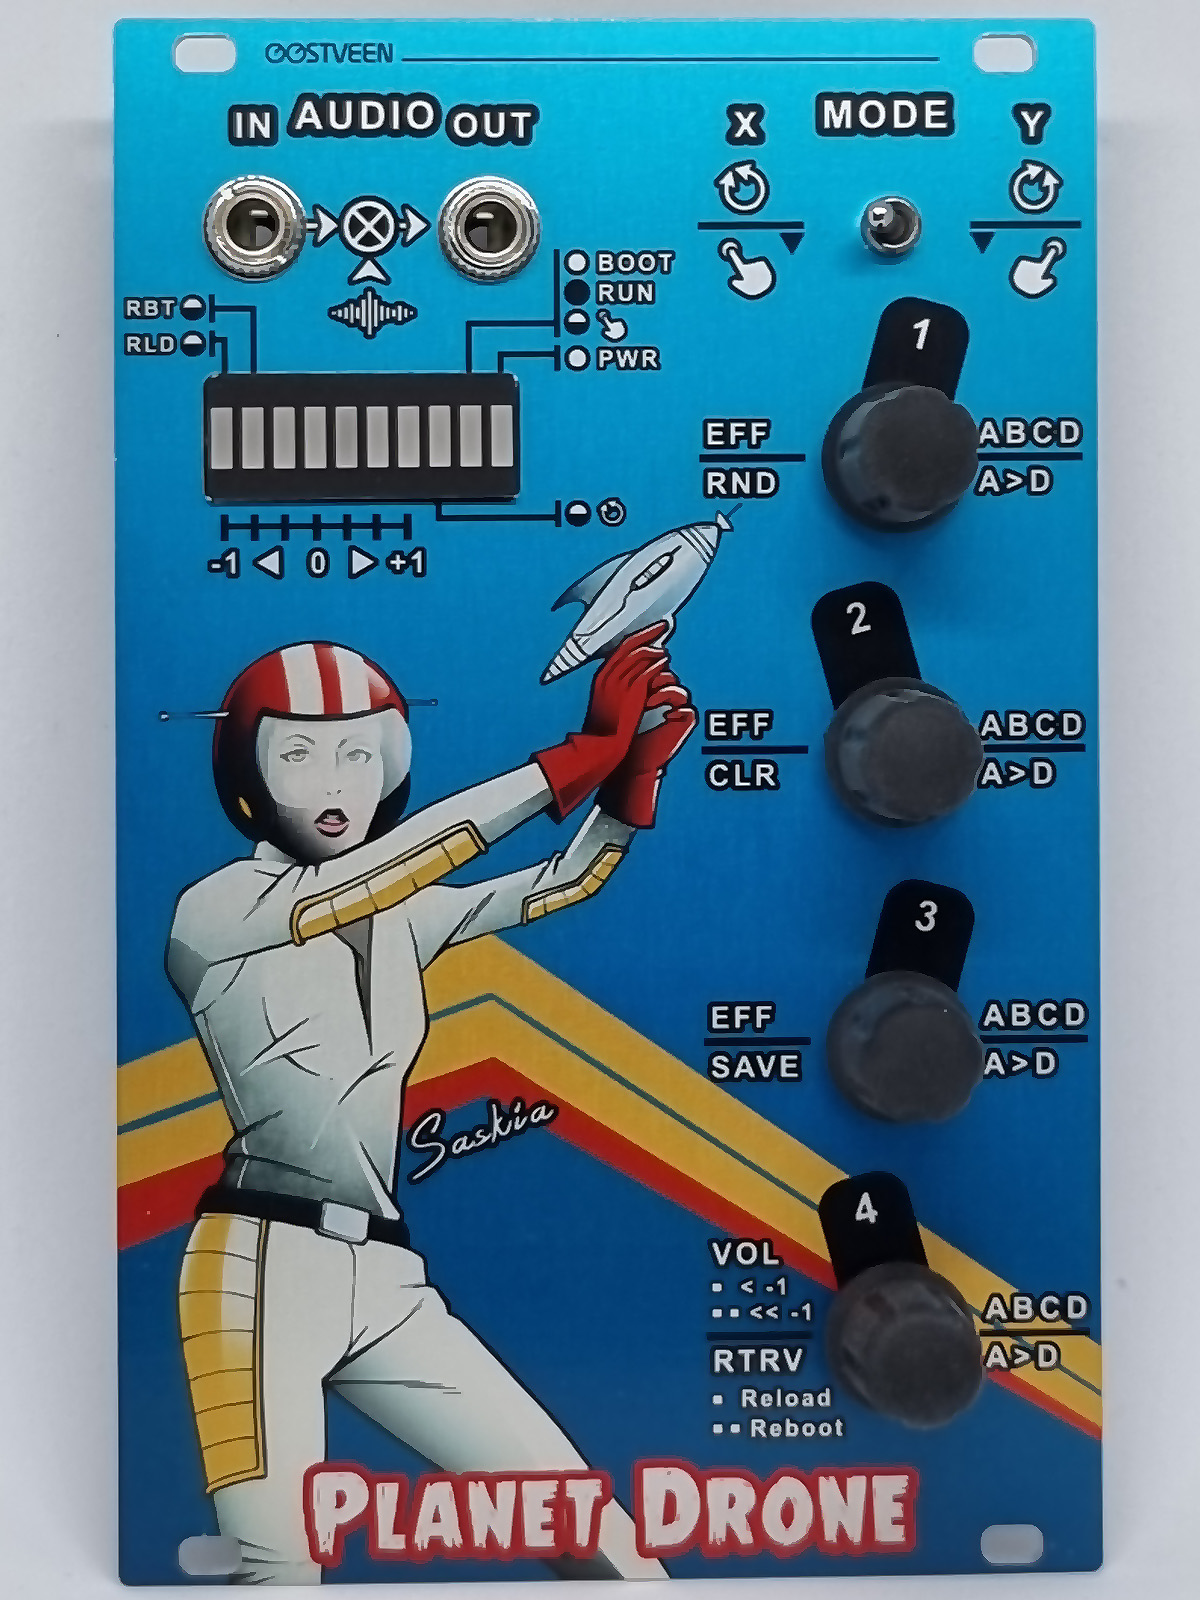
*shown below is 1 of 3 front panels (each functionally the same)
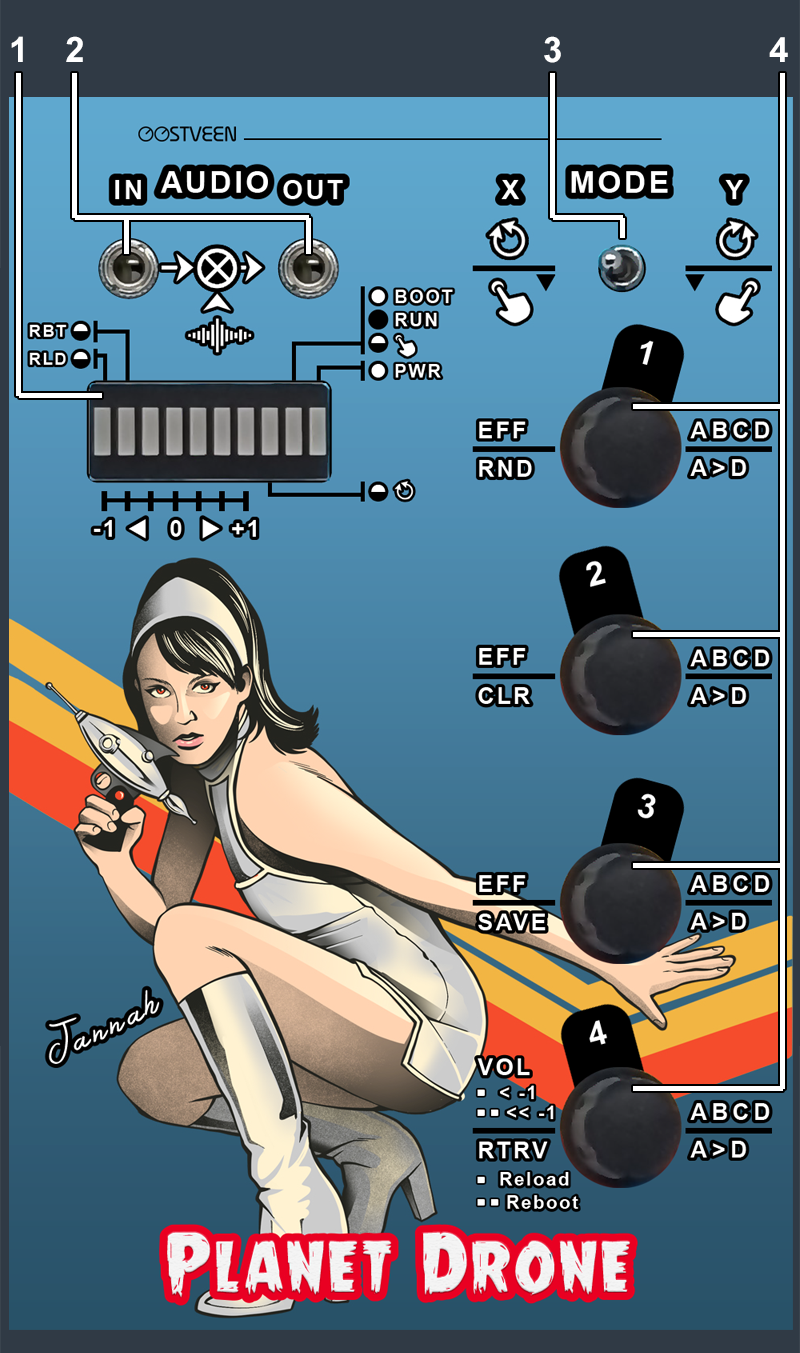
- 10 Segment LED bar graph
The bar graph provides visual feedback when operating the module's toggle switch and encoders/push buttons.
▪ Parameter values, typically, run from -1 to +1
NOTE: You can go beyond these safe boundaries to explore the limits of SuperCollider, however, by the nature of SuperCollider's implementation, reaching those limitation may cause glitches and/or extremely loud audio artifacts! - If this happens, turn down the volume or press encoder 2 (in X-MODE) or change the patch (X-MODE | "<-1" | Press encoder 4)
▪ The modules' volume (Encoder 4 | X-MODE) runs from -100dB (-1) to 0dB (0) to above 0dB. Going above 0dB may cause the sound to distort (this depends on the patch).
▪ Notice that as you go up and down the scale, the LEDs on either side of 0 flash briefly to indicate the exact moment of reaching 0.
- Stereo Audio IN & Audio OUT/THROUGH
Planet Drone allows for daisy-chaining Audio (A.); Audio Out contains the (Stereo) sound generated by the module itself. The Audio In signal (Stereo) is mixed with Audio Out through a passive mixer. You can, of course, connect each module to a seperate stereo input of your mixing console (B.). Daisy-chaining, however, saves valuable console channels! - in addition you can add an external stereo source if you want to (C.)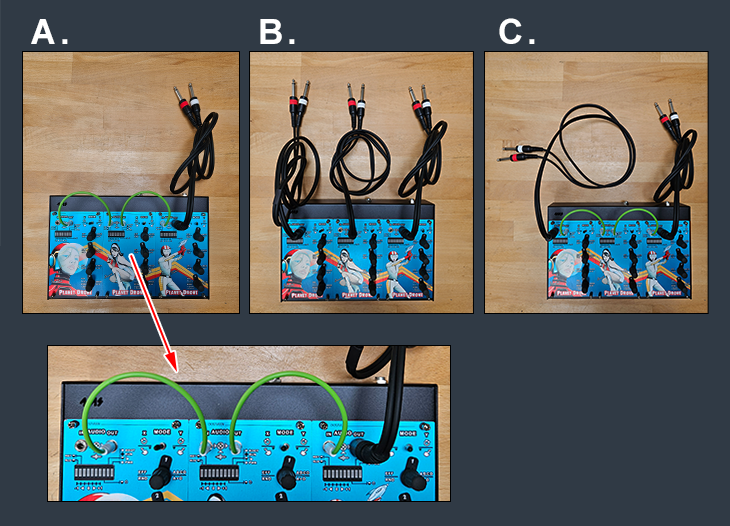
Below - keep in mind that Planet Drone is stereo, so please use Stereo 3.5mm jack Plugs!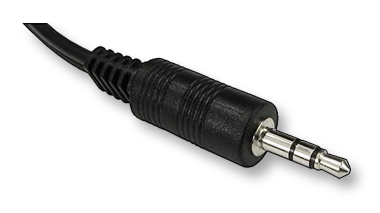
- MODE Switch X/Y
Planet Drone operates in one of two modes (Mode X or Mode Y). More on this further below. - Encoder/Push Button (Numbered: 1, 2, 3 and 4)
▪ In Mode X -represented by the text on the left of the encoders- you have access to four tunable parameters(3 x effects + 1 x volume) and four actions (the encoder's push buttons).
▪ In Mode Y -represented by the text on the right of the encoders- you have access to up to 16 tunable parameters to alter the sound. Each encoder controls up to four parameters. You use an encoder's push button to cycle through the values. Note that not every patch (sound) comes with 16 tunable parameters; it's either 4, 8, 12 or 16.
Below are the descriptions of the most important icons and text.
We'll explain things in detail further below.
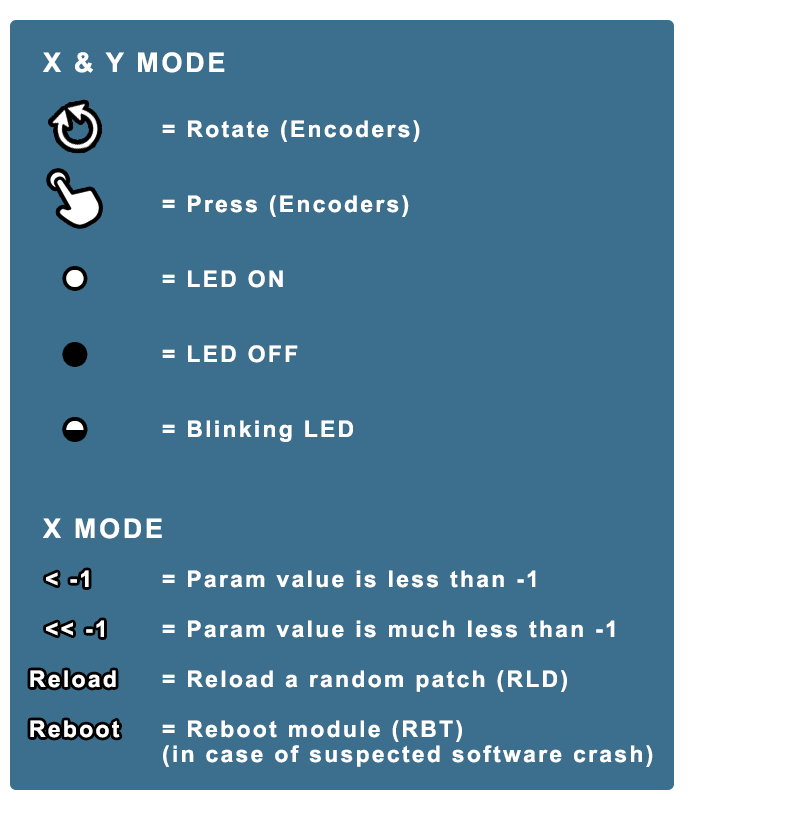
Module operations in X MODE
In X MODE, you can control the following:
▪ EFFect 1 (Rotate Encoder #1)
▪ Randomize patch parameters (RND)
(Push Encoder #1)
Note that in V2.0, this function, at random,
randomizes patch parameters beyond 1.0
If it does, you will see the following LED pattern:
▪ EFFect 2 (Rotate Encoder #2)
▪ Clear patch parameters to 0/default (CLR)
(Push Encoder #2)
▪ EFFect 3 (Rotate Encoder #3)
▪ Save patch parameters (SAVE)
(Push Encoder #3)
▪ VOLume 2 (Rotate Encoder #4)
▪ Retrieve saved patch parameters (RTRV)
(Push Encoder #4)
About Encoder #4:
Typically, you use this Encoder for changing the Volume and Retieving saved patch parameters; but, there's more depending on where you are on the bar graph:
▪ ▪ Go below -1 (depicted as "<-1") and LED "RLD" (1st LED) starts blinking fast indicating that if you press the encoder now, it will Reload and select a new random patch.
Note that It will take a few seconds for the new patch to load; wait for the loading bar to complete before turning up the Volume.
▪ ▪ Go way below -1 (depicted as "<<-1") and LED "RBT" (2nd LED) starts blinking fast indicating that if you press the encoder now, it will do a full Reboot (can take a few minutes). This option is included in case, for whatever reason, the Raspberry PI crashes. It is rare for this to happen, but it's nice to have a reboot option instead of having to power down/up your whole Eurorack setup(!).
Module operations in Y MODE
In Y MODE, you can control the following:
▪ Control parameters ABCD (Rotate Encoder #1)
▪ Select parameter A, B, C or D (A>D)
(Push Encoder #1)
▪ Control parameters ABCD (Rotate Encoder #2)
▪ Select parameter A, B, C or D (A>D)
(Push Encoder #2)
▪ Control parameters ABCD (Rotate Encoder #3)
▪ Select parameter A, B, C or D (A>D)
(Push Encoder #3)
▪ Control parameters ABCD (Rotate Encoder #4)
▪ Select parameter A, B, C or D (A>D)
(Push Encoder #4)
About Encoders #1 to #4:
After power/boot-up, Encoders #1 to #4 all control parameter A ba default (i.e. 1A, 2A, 3A & 4A) - this is the minimum number of parameters a patch can have (plus, of course, Eff #1, #2 & #3 in X MODE).
Each patch has either 4, 8, 12 or 16 parameters that you can control with encoders #1 to #4;
▪ 4 (parameters: 1A, 2A, 3A, 4A)
▪ 8 (parameters: 1A, 1B, 2A, 2B, 3A, 3B, 4A, 4B)
▪ 12 (parameters: 1A, 1B, 1C, 2A, 2B, 2C, 3A, 3B, 3C,
4A, 4B, 4C)
▪ 16 (parameters: 1A, 1B, 1C, 1D, 2A, 2B, 2C, 2D,
3A, 3B, 3C, 3D, 4A, 4B, 4C, 4D)
You won't know how many parameters a patch has until after pressing an encoder;
If a patch has 4 parameters, then pressing an encoder will make the 2nd LED from the right blink only once (just parameter A to control).
If a patch has 8 parameters, then pressing an encoder will make the 2nd LED from the right blink twice indicating that you are now controlling parameter B. Press it again and it will blink once, indicating your are controlling parameter A again.
Planet Drone - The inner workings of
How does Planet Drone produce these wonderful soundscapes? - and how does it control sound characteristics?
Let's start with a visual to illustrate Planet Drone's inner workings:
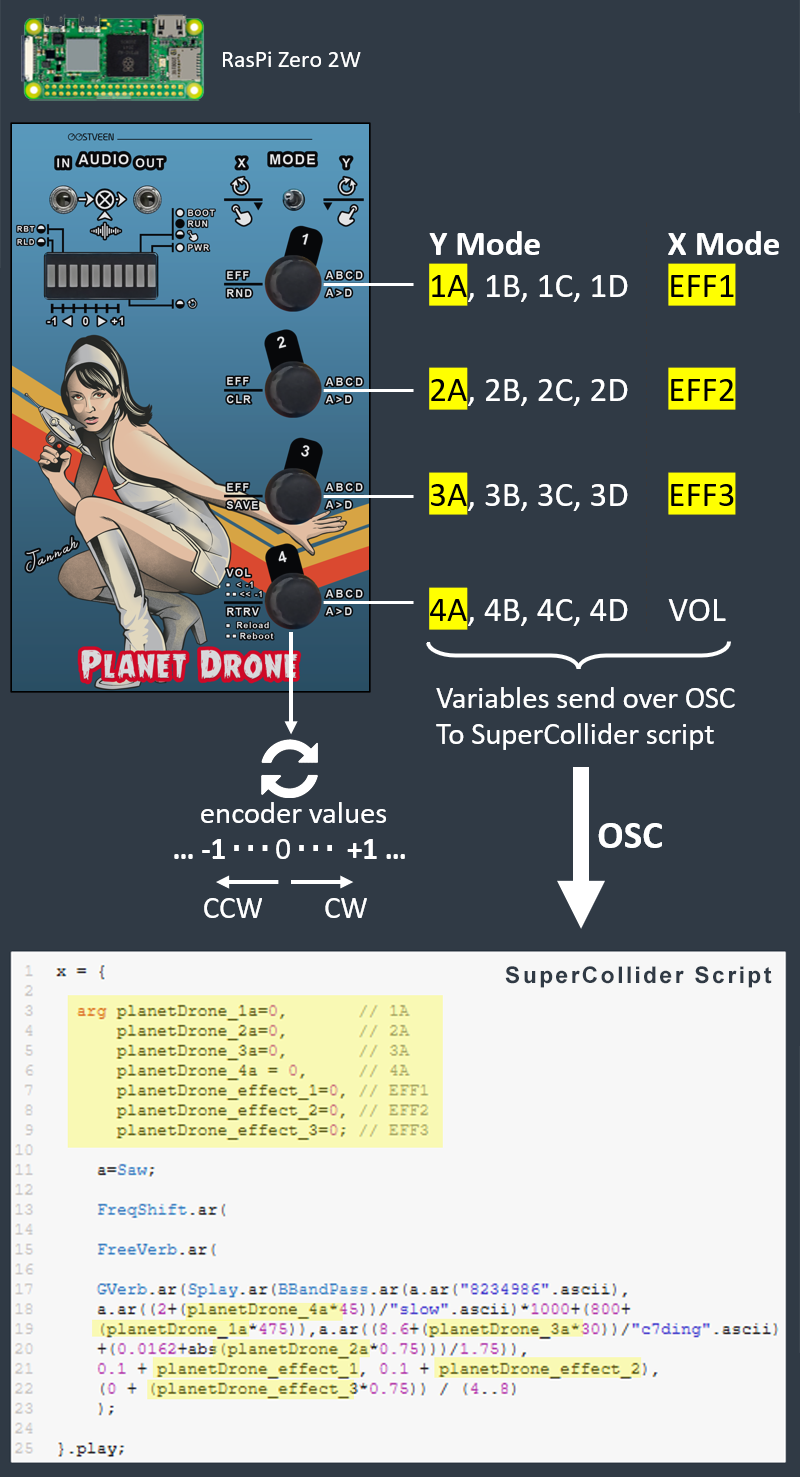
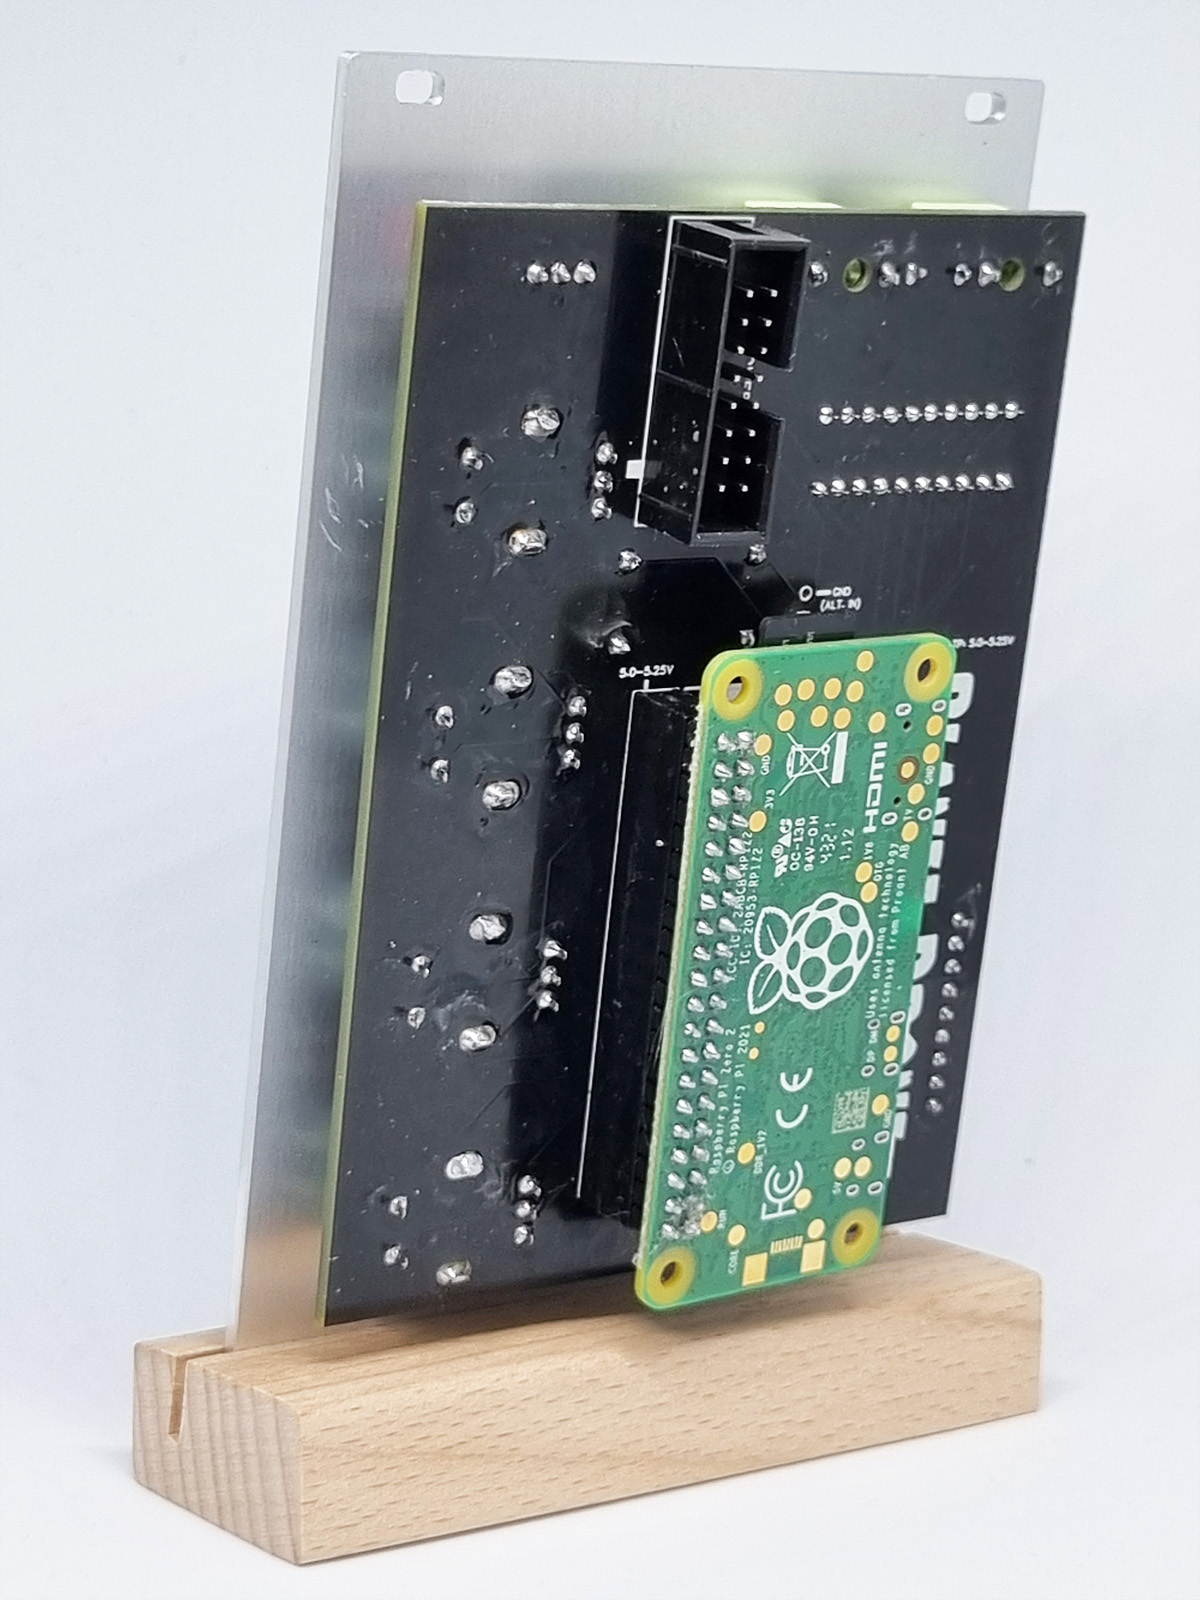
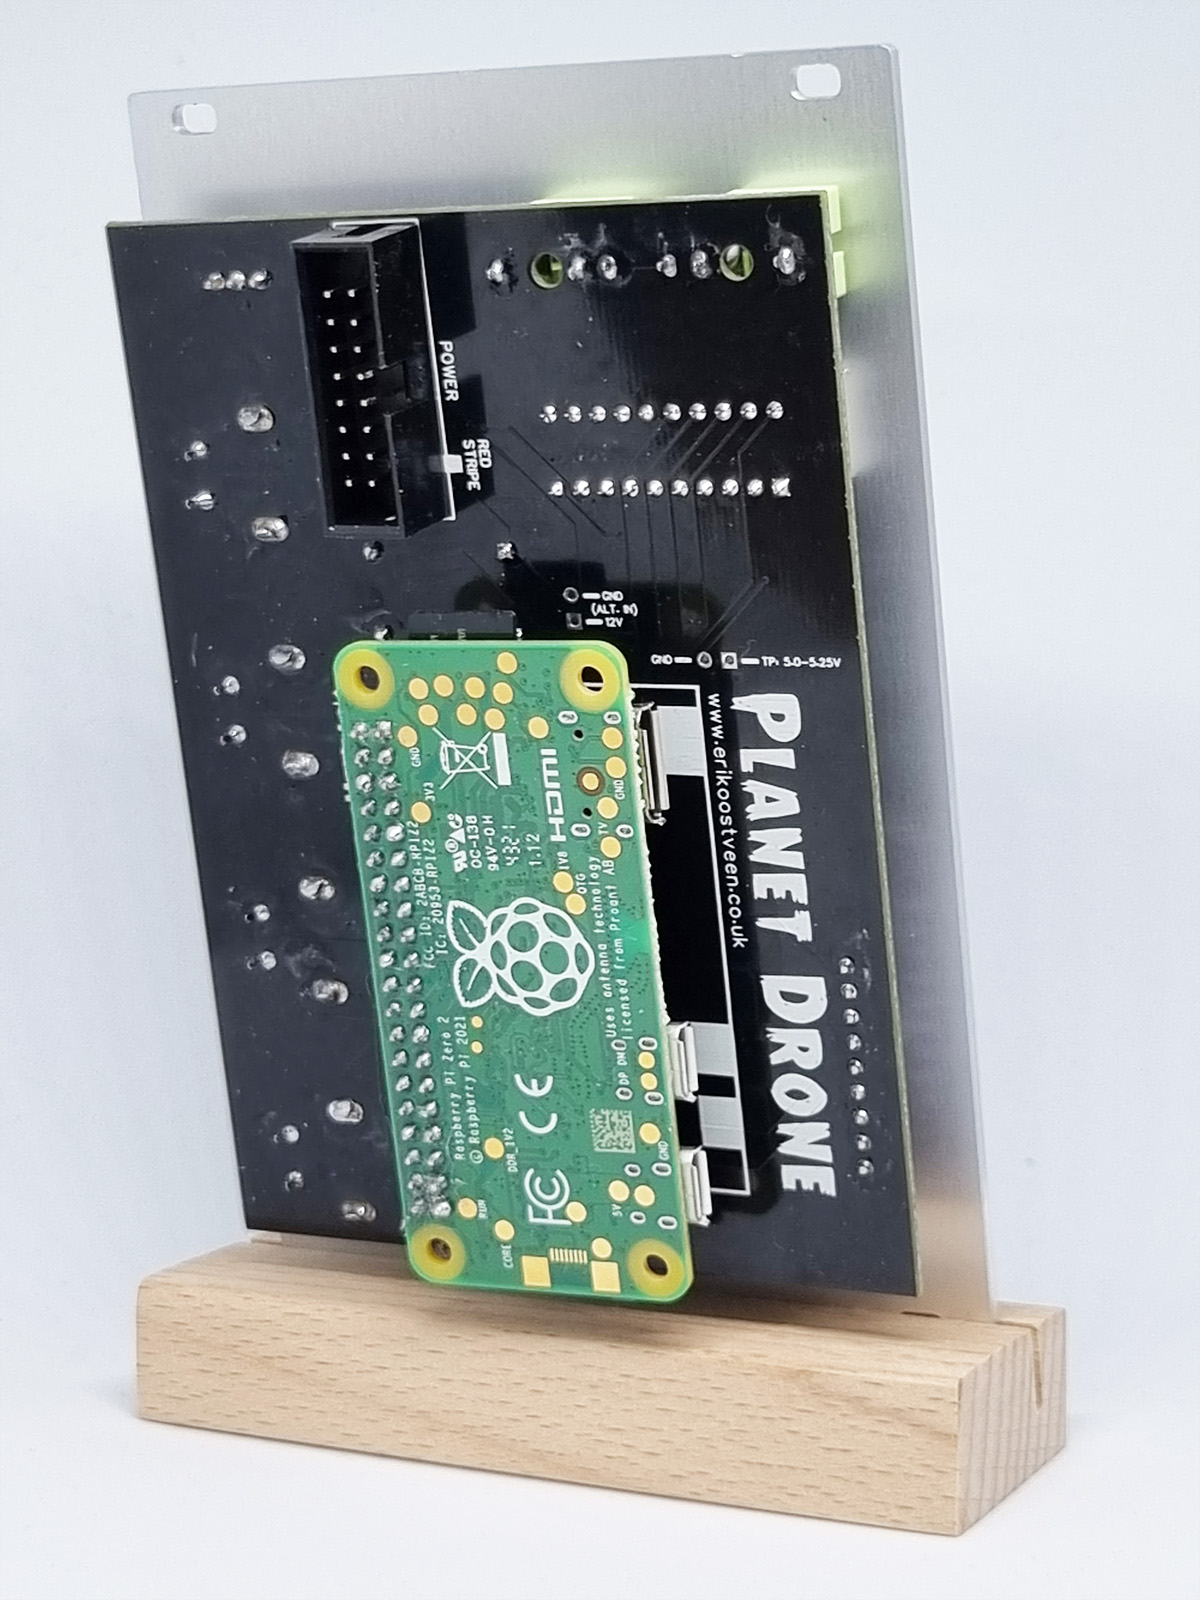
Planet Drone is based on the Raspberry PI Zero 2W. It's a powerful credit-card sized computer that runs Linux as its operating system.
Installed on the Raspberry PI are SuperCollider, the realtime audio engine and Python, which monitors/controls the encoders, switches and LEDs.
On power-up, a small script initiates the following;
▪ It starts SuperCollider
▪ It selects a random patch from the patches directory
▪ It starts the main Python program
Please NOTE that, since the Raspberry PI is a computer, it will take a little while to fully boot - this typically takes 30 seconds, BUT it can take up to two minutes. This all depends on the software-housekeeping the Raspberry needs to carry out.
Ok, back to the picture. In the SuperCollider script (we'll call it Patch), a number of arguments (we'll call them Parameters) can we defined. We define these in the header so that we can use them in the SuperCollider code (highlighted yellow).
SuperCollider is constantly listening on a OSC software port. OSC is short for Open Sound Control - it's the software equivalent of MIDI.
Everytime you turn an encoder, the Python main program broadcasts new values for any of the given Parameters over OSC and SuperCollider then applies these new values to the Patch that is running, which results in a change of pitch, effect (reverb etc.), filter settings or anything else that SuperCollider can change in realtime; it's a long list of what is referred to as Classes.
In the example here, the parameter "planetDrone_effect_1" (i.e. encoder 1 in X-Mode) sets the Reverb's room size.
Note that the values comming from the encoders are only small (like +0.0201, +0.7631, -0.1852, 0, +1.0, -1.0 or beyond -1/+1) but in the code you can, of course, multiply parameters by much larger values to suit your needs - for example, "planetDrone_1a * 1000"
Planet Drone - Advanced stuff!
Roll up your sleeves and let's get into Planet Drone. We are going to assume that you are familiar with Raspberry PI and have basic Linux knowledge!
You can logon to the Planet Drone module by either connecting a USB keyboard or via WIFI (Raspberry PI Zero W / 2 W). This section describes how to setup the Planet Drone module for remote logon (WIFI).
- Connect a HDMI monitor
- Connect a USB keyboard
- Power on the Planet Drone module
- Wait until you see the "pi@PlanetDrone-..." prompt
- At the prompt enter sudo raspi-config
- Select System Options
- Select Wireless LAN
- Enter the SSID - i.e. the name of your wireless network & OK
- Enter the password to gain access to your wireless network & OK
- Select Finish
- At the prompt enter sudo reboot now
- Once more, wait until you see the "pi@PlanetDrone-..." prompt
- You can disconnect the USB keyboard and monitor now - and put them away
- Logon to your WIFI router and check out the connected devices in your WIFI network.
Look for a device name called "PlanetDrone-<your module name>" and make a note of its IP address - Lauch your favourite SSH client and use IP Address, Username: pi and Password: raspberry to initiate a SSH session to the Planet Drone module
- Congrats!, you now have remote connectivity.
Now that your are in, let's look at the most important files and directories first ("ls -l")
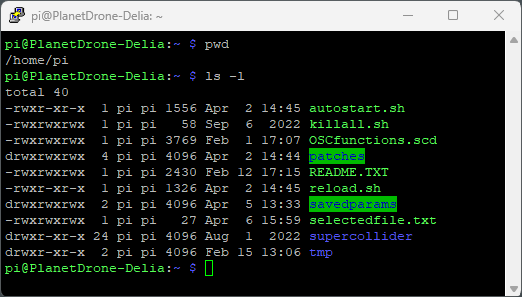
▪ "autostart.sh" This bash script is auto-initiated at power up
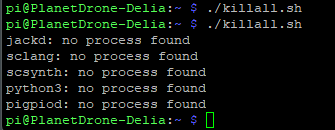
▪ "killall.sh" This bash script stops all SuperCollider and Python processes
▪ "patches" This directory contains the module's patches
▪ "README.TXT" A handy text file containing useful commands put together during the development of the module
▪ "reload.sh" Similar to the autostart.sh script but used to load a new random patch as the module is running. This script is initiated by the main Python program everytime you press encoder 4 (in X-MODE & "<-1")
▪ "selectedfile.txt" This text file contains the name of the last ran patch. It is used by the reload.sh script to avoid selecting the same "random" patch in a row.
Moving on to the patches directory ("cd patches", "ls -l")
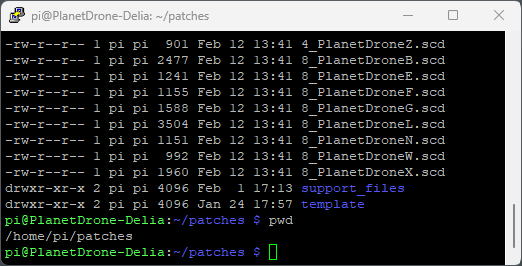
▪ "xyz.scd" All .scd files are the actual SuperCollider scripts
▪ "support_files" Some, more complicated, SuperCollider scripts require additional files; this is where to put them
▪ "template" You can use the SuperCollider template file in this directory to start a patch from scratch though it's just as easy as copying an existing one giving it a new name
... talking about patch names; you MUST tell the Python script how many (active) parameters the patch contains by starting the patch filename with "4_", "8_", "12_" or "16_". Some examples:
"4_mypatch.scd", "8_yourpatch.scd", "12_ourpatch.scd", "16_no-ones_patch.scd", 4_weirdSound.scd" etc. Avoid spaces in the file naming!
Let's create a new patch!
From the home directory, go to the Patches directory: cd patches
Create a new patch file: sudo nano 4_mypatch.scd
Copy/Paste the following code:
s.waitForBoot{

"../OSCfunctions.scd".loadRelative;

x = {

  arg
  planetDrone_1a, planetDrone_2a, planetDrone_3a, planetDrone_4a,
  planetDrone_1b, planetDrone_2b, planetDrone_3b, planetDrone_4b,
  planetDrone_1c, planetDrone_2c, planetDrone_3c, planetDrone_4c,
  planetDrone_1d, planetDrone_2d, planetDrone_3d, planetDrone_4d,
  planetDrone_effect_1, planetDrone_effect_2,	planetDrone_effect_3,
  sine1, sine2, sine3, sine4,
  result;

  sine1 = SinOsc.ar(200 + (planetDrone_1a * 1000), 0, 0.5).dup;
  sine2 = SinOsc.ar(300 + (planetDrone_2a * 1000), 0, 0.5).dup;
  sine3 = SinOsc.ar(400 + (planetDrone_3a * 1000), 0, 0.5).dup;
  sine4 = SinOsc.ar(500 + (planetDrone_4a * 1000), 0, 0.5).dup;

  result = (sine1 + sine2 + sine3 + sine4);

  }.play;

s.volume = -95;

}
Save the file: CTRL + S
Exit the editor: CTRL + X
Go back to the home directory: cd ..
We now need to edit the "autostart.sh" and "reload.sh files" in order to force the Planet Drone module to run the patch that we a building rather than some other random patch.
Edit "autostart.sh": sudo nano autostart.sh
Look for the section "Override selected patch". Remove the hash in front of the line that starts with "selectedfile..." and make it read as follows:

Save the file: CTRL + S
Exit the editor: CTRL + X
Edit "reload.sh": sudo nano reload.sh
Do exactly the same here what you did in "autostart.sh"
Now, at this point the Planet Drone module is running a patch. We need to kill all related processes before we restart Planet Drone and force it to run our new patch.
Kill all SuperCollider and Python processes: ./killall
Restart Plamet Drone: ./autostart.sh
You'll see a bunch of lines including warnings etc., but you know it's working when you see the line "Shared memory server interface initialized"
Set the toggle switch to X MODE and turn up the volume (encoder 4)
Set to toggle switch to Y MODE and try out each encoder - turning them will make each of the 4 oscillators change pitch independently.
Set the toggle switch back to Y MODE and press the first encoder. Each time you press the encoder, Planet Drone will randomize the values of the parameters controlling the pitch of each oscillator automatically. It randomizes all parameters between -1 and +1.
Press encoder 2 and all parameters will be reset to 0.
If, after tweaking the encoders and/or pressing the random function, you like what you hear, you can save this "Soundscape" by pressing encoder 3 (SAVE).
Do some more tweaks and then press encoder 4 (X MODE, RTRV) this will retrieve what you saved previously.
Of course, you must have noticed that the effect encoders don't do anything because we have not yet applied them to the patch's code.
This is the point where the sky is the limit; have a look at these examples: Planet Drone Examples and start experimenting! On the examples page, Example 1 is what you just did (the simple 4 oscillator drone patch). Go ahead, press CTRL + C twice to stop Supercollider and re-edit the "4_mypatch.scd" file and replace the code by example 2, 3, 4, 5 and eventually example 6 for a fully functional drone.
Remember to kill all processes (./killall.sh) before re-running ./autostart.sh everytime to want to listen to the changes you made to the code. When you are happy with the result, just re-edit the "autostart.sh" and "reload.sh" files making sure to put the hash symbol (#) back in front of the "selectedfile=..." line, otherwise your Planet Drone module will only ever startup with that one patch.
When you are all done, you may want to enter sudo reboot now to do a full reboot of the module. Your new patch is now automatically added to the pool of patches and as you start up your module or reload a random patch, you own patch may sound out loud!
FAQ
Q1: What are those animated LED patterns?
A1: When a module is being idle for 3 minutes (droning away I assume), retro alike LED patterns start showing up (Star trek TOS inspired computers). This is purely decorative - to keep your eyes entertained.
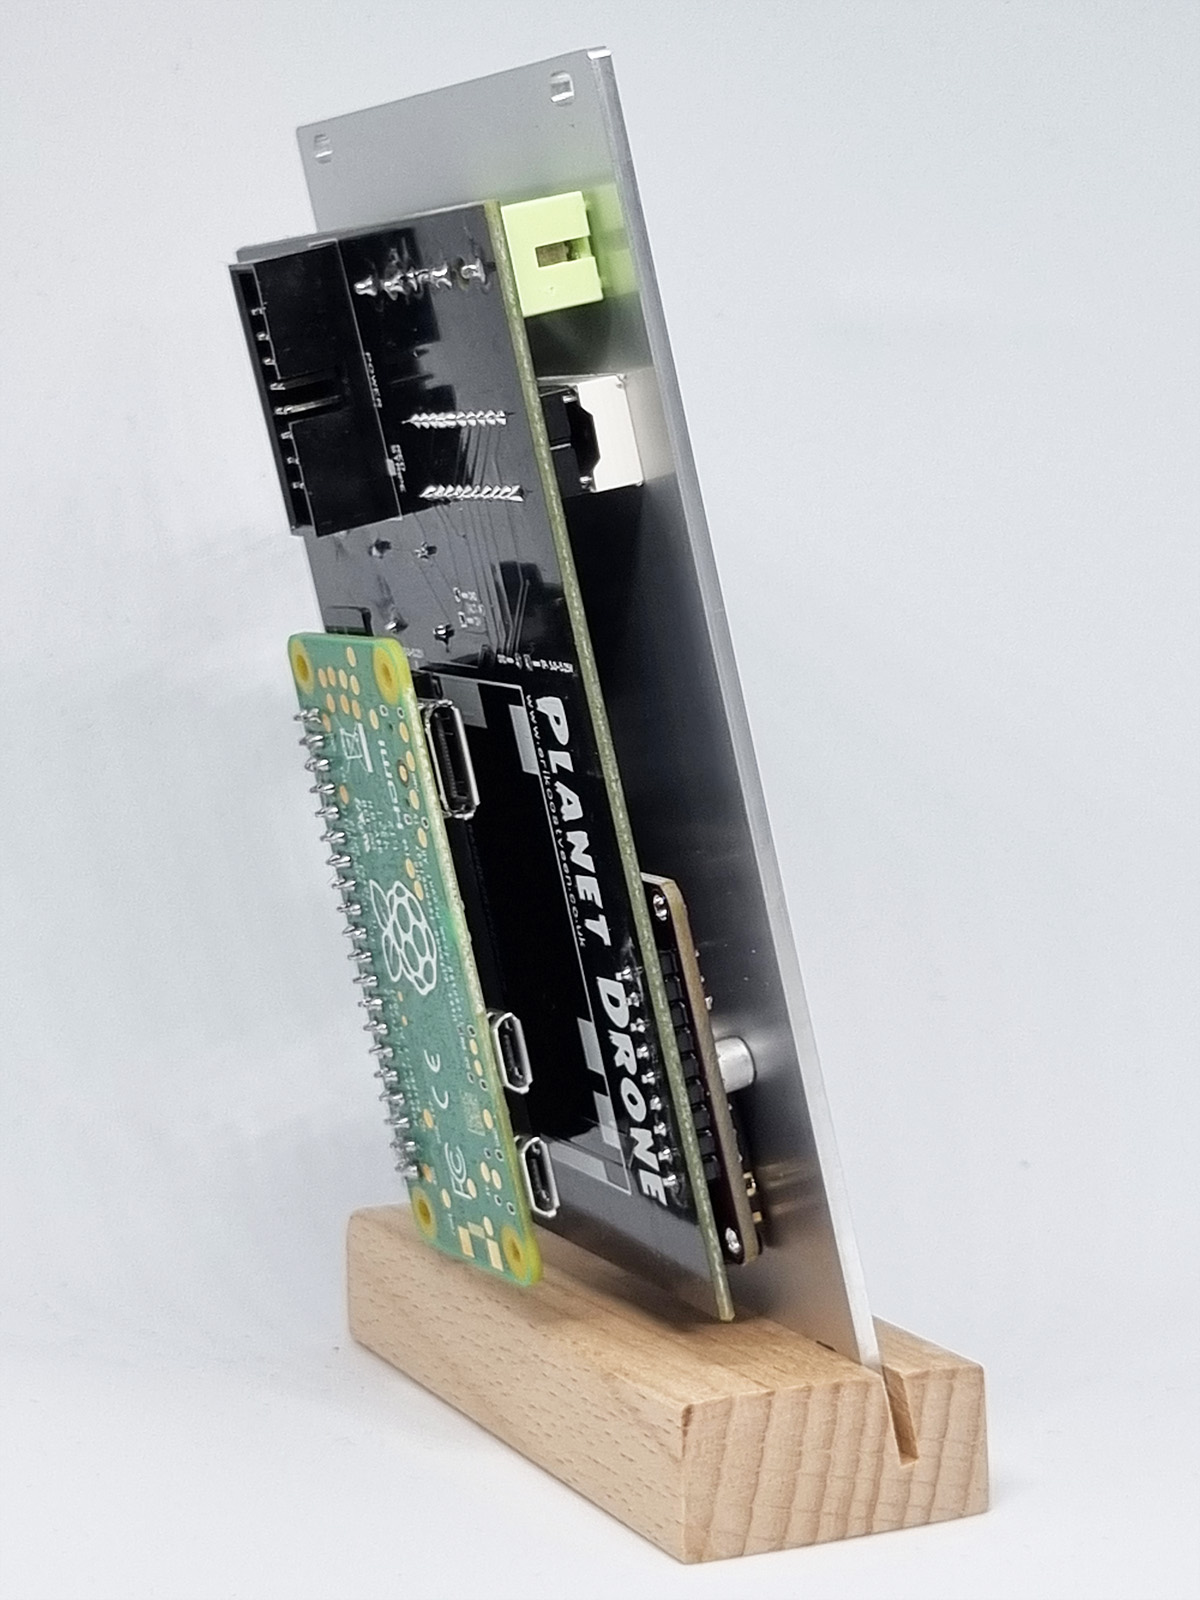
Q2: On the back of the module, there’s a little board with a 3.5mm jack. What is that for?
A2: That’s the module’s audio board. The module’s 3.5mm output accessible from the front is just a copy of the audio board’s 3.5mm socket. You can use it if you want to but it’s rather tucked away in a Eurorack setting.
Q3: Do any of the Planet Drone modules accept a different Raspberry PI board?
A3: Well, it was initially designed for the Raspberry PI Zero W but then the Zero 2W was released and I decided to continue the development with the Zero 2W as it has much better performance. In practical terms, the PCB’s 40 pin socket seats only the Zero W and Zero 2W – in addition, the design assumes an external audio board, which is already present on the larger Raspberry PI boards … so you’d have to do some config tweaking to make things work – but keep in mind that these larger boards don’t properly sit on the PCB’s 40pin connector.
Q4: Sometime the boot-up time takes longer. Why?
A4: Typically, boot-up time is around 30 seconds. I some cases, however, the Raspberry PI’s Operating System needs to do some housekeeping during the boot-up sequence – in those cases it may take up to around 2 minutes. In developing the modules, the longest boot-up time I have experienced was close to 3 minutes – and that happened about 3 times in the 8 months of development.
Q5: What’s the deal with the Delia module?
A5: The Delia module is a limited edition version of the Planet Drone series and contains all combined patches of the 3 original modules. I commissioned the character-design for the annual “The City is Full of Noises“ festival (Coventry, UK). This event all about electronic music. It also celebrates the live of the late electronic music pioneer Delia Derbyshire. Coventry is Delia’s place of birth and happens to be my home town.
Q6: When I press an encoder for the first time after boot-up, I have to press it again to make it work. Why?
A6: This is a fluke in the button & encoder Python library. If it happens, it only happens once. After that, the pressing of buttons works as intended. I hope to de-bug it at some point. Remember, it’s all open source – so, happy for other people to fix these things as well. I’ll buy you a coffee if you do.
Q7: Sometimes turning encoders has no effect on the sound. Why not?
A7: 2 Reasons; A. Not all parameters have to be “assigned” to any of the patch’s variables. The defaults patches, however, are all, in one way or another, “assigned” to a variable. B. Since you can’t see what part of the patch you are influencing, which is part of the fun in building soundscapes, you might, for example, change the frequency of an LFO, but the LFO’s depth is still set to 0 … so you won’t hear the effect until after you also change the LFO’s depth setting. In another case, you might have opened a filter so much that changing the pulse width of some oscillator is hard to hear. So, there are a thousand and one reasons why it’s sometimes difficult to tell whether turning an encoder makes any difference. Keep also in mind that some patches have very low LFO settings … so, a change does actually have effect but you only notice over a longer interval.
Patch Names & Descriptions
| Patch Name & Description | Included with Module(s) |
|---|---|
| Patch: 4_PlanetDroneA.scd
Descr.: Brown noise and changing background tones |
Samantha | Delia |
| Patch: 4_PlanetDroneC.scd
Descr.: Space drone |
Samantha | Delia |
| Patch: 8_PlanetDroneE.scd
Descr.: Crystal pings |
Samantha | Delia |
| Patch: 8_PlanetDroneG.scd
Descr.: Panning drone eerie |
Samantha | Delia |
| Patch: 4_PlanetDroneI.scd
Descr.: Rumbling drone |
Samantha | Delia |
| Patch: 4_PlanetDroneK.scd
Descr.: Monotone space engine |
Samantha | Delia |
| Patch: 8_PlanetDroneN.scd
Descr.: Wobble Bass |
Samantha | Delia |
| Patch: 4_PlanetDroneT.scd
Descr.: Glitch! |
Samantha | Delia |
| Patch: 8_PlanetDroneX.scd
Descr.: White noise and glitch |
Samantha | Delia |
| Patch: 4_PlanetDroneY.scd
Descr.: Pink noise storm |
Samantha | Delia |
| Patch: 4_PlanetDroneBB.scd
Descr.: Tube noise |
Samantha | Delia |
| Patch: 4_PlanetDroneCC.scd
Descr.: Engine Room 2 |
Samantha | Delia |
| Patch: 4_PlanetDroneJJ.scd
Descr.: Rain & Thunder |
Samantha | Delia |
| Patch: 8_PlanetDroneB.scd
Descr.: 4 droning square waves |
Jannah | Delia |
| Patch: 4_PlanetDroneD.scd
Descr.: Strings autogenerative |
Jannah | Delia |
| Patch: 4_PlanetDroneH.scd
Descr.: Dog fight |
Jannah | Delia |
| Patch: 8_PlanetDroneW.scd
Descr.: Organ alike sequence |
Jannah | Delia |
| Patch: 4_PlanetDroneZ.scd
Descr.: Glock |
Jannah | Delia |
| Patch: 4_PlanetDroneEE.scd
Descr.: Eerie I |
Jannah | Delia |
| Patch: 4_PlanetDroneFF.scd
Descr.: Eerie II |
Jannah | Delia |
| Patch: 4_PlanetDroneGG.scd
Descr.: Modem |
Jannah | Delia |
| Patch: 4_PlanetDroneHH.scd
Descr.: FM Beating OSCs |
Jannah | Delia |
| Patch: 4_PlanetDroneII.scd
Descr.: Panning Pulse |
Jannah | Delia |
| Patch: 8_PlanetDroneF.scd
Descr.: Autogenerative metalic blocks playing |
Saskia | Delia |
| Patch: 4_PlanetDroneJ.scd
Descr.: Metal Klang! ... Klong! |
Saskia | Delia |
| Patch: 8_PlanetDroneL.scd
Descr.: Sampler 1 (non-beat-synced) |
Saskia | Delia |
| Patch: 4_PlanetDroneM.scd
Descr.: Bouncing Blip |
Saskia | Delia |
| Patch: 12_PlanetDroneO.scd
Descr.: Rhythmic Bass Bounce |
Saskia | Delia |
| Patch: 4_PlanetDroneP.scd
Descr.: Sampler 2 (beat-synced) |
Saskia | Delia |
| Patch: 4_PlanetDroneQ.scd
Descr.: Sampler 3 (choir) |
Saskia | Delia |
| Patch: 4_PlanetDroneR.scd
Descr.: Sampler 4 (keys, guitar) |
Saskia | Delia |
| Patch: 4_PlanetDroneS.scd
Descr.: Sampler 5 (Misc: Ambient, Digeridoo) |
Saskia | Delia |
| Patch: 4_PlanetDroneU.scd
Descr.: Slap echo and sustained tone |
Saskia | Delia |
| Patch: 4_PlanetDroneV.scd
Descr.: Harsh 8-bit-ish tones |
Saskia | Delia |
| Patch: 4_PlanetDroneAA.scd
Descr.: Rattle-run drone |
Saskia | Delia |
| Patch: 16_PlanetDroneDD.scd
Descr.: Sampler 6 ASMR |
Saskia | Delia |
| Patch: 4_PlanetDroneKK.scd
Descr.: Little drummer |
Saskia | Delia |
| Patch: 4_PlanetDroneLL.scd
Descr.: Dr Who Tardis Sound |
Saskia | Delia ONLY |
| Patch: 4_PlanetDroneMM.scd
Descr.: Delia's voice, Klicking voices |
Saskia | Delia ONLY |
| Patch: 4_PlanetDroneNN.scd
Descr.: More Beats |
Saskia | Delia ONLY |
| Patch: 4_PlanetDroneOO.scd
Descr.: Retro Gaming |
Saskia | Delia ONLY |
| Patch: 4_PlanetDronePP.scd
Descr.: E-Pulsar |
Saskia | Delia ONLY |